
General Information
The guide is intended for partners connecting via the Payment Acceptance Protocol.
You will learn from the guide:
- How to register in the Account Profile.
- What sections does the Account Profile consist of.
- Information about connected services.
- Which roles are used in the Account Profile.
- How to issue invoices without integration and track payment.
- How to issue invoices via Telegram.
- How to generate a QR Code for payments.
- How to search for transactions.
- How to recover the password from the Account Profile.
- How to issue a token for authorization in the API.
- How to issue a key for server notifications.
Getting Started
You apply for connection yourself through the website or through an accompanying manager.
Login to your account
After your accompanying manager completes the application and adds a record to your Account, you will receive an email.
Follow the link in the email to confirm your email address.
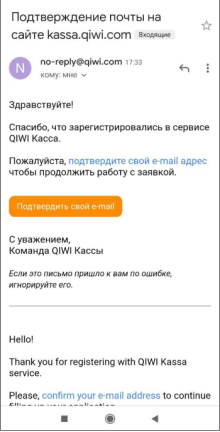
The link will direct you to the form for setting a password from the Account Profile. Enter your password and click Login to enter your Account Profile.
No confirmation email has been received
-
Follow the link and click Remind me.
-
Enter your e-mail and click Continue.
-
Check your email. You will receive a message with a link to change your password.
Main Page of the Account Profile
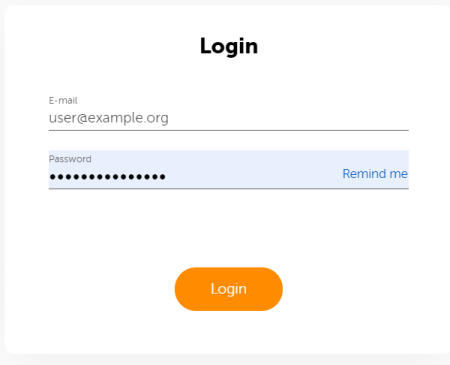
Login to the Account Profile is carried out by e-mail and the password that you came up with when confirming the e-mail.
After logging in, you will be taken to the main page of your Account Profile, where four tabs are available:
- Services.
- Requests.
- Users (only for the Administrator role, see the Roles in My Account section for details).
- Support.
Click a tab to open the corresponding section.
Services
The tab displays your connected sites and ID.
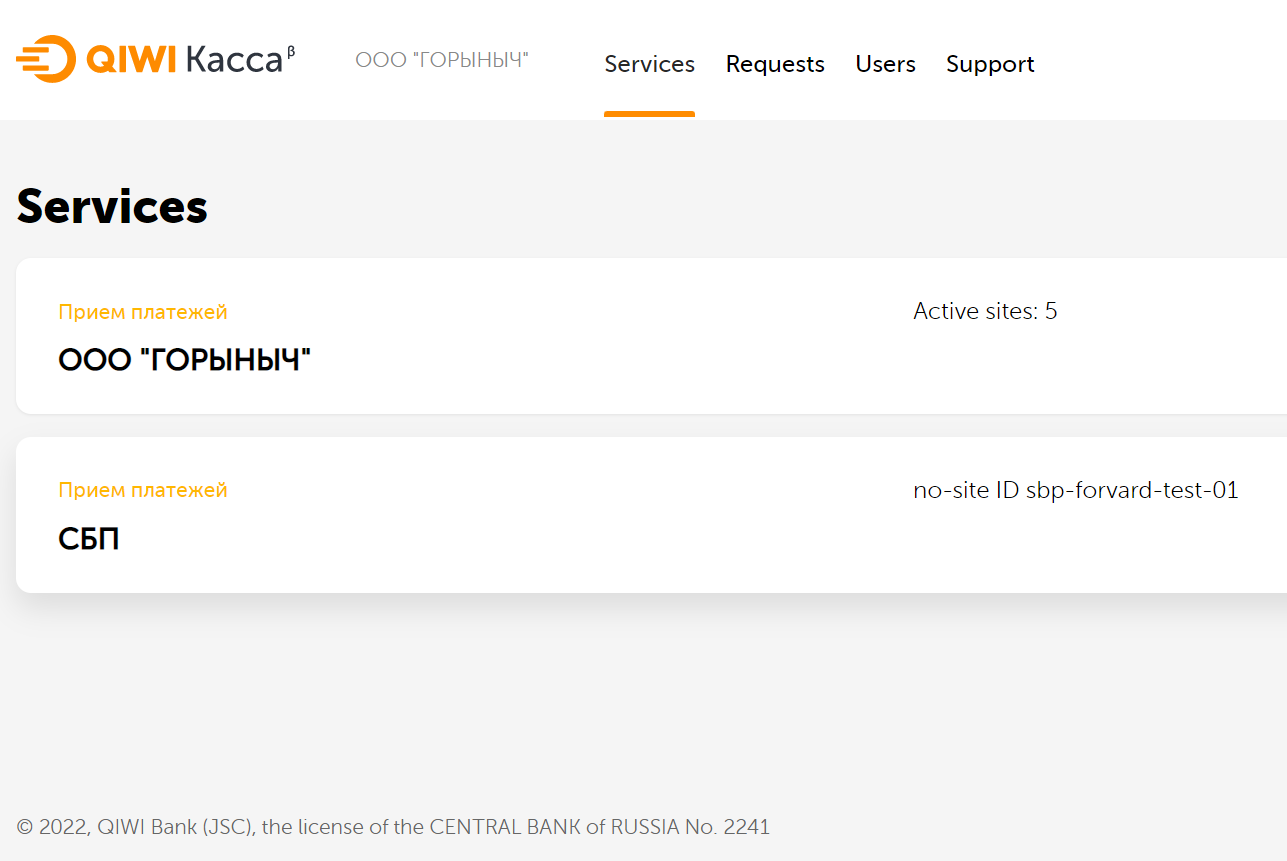
Click on the name of the service to open the Account Profile of the connected site. For more information, see the Account Profile for the Connected Site section.
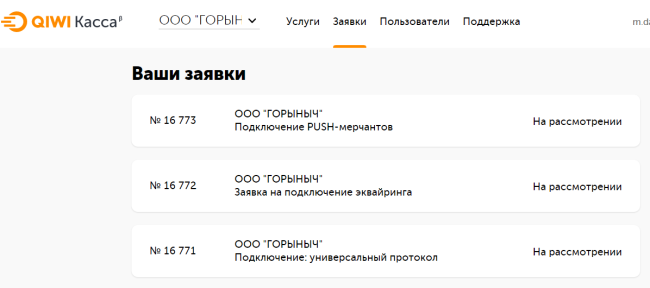
Requests
The tab displays your requests. Click on the application to get detailed information about its status and a description of your next steps.
Users
On this tab you can configure your employees' access to the Account Profile:
- Click the Add user button at the bottom of the list of employees.
- Specify an e-mail and select an employee role (Technical specialist, Manager, Administrator). For more information about roles, see the Roles in My Account section.
- Put an optional description into Comment field.
-
Click the Create button.
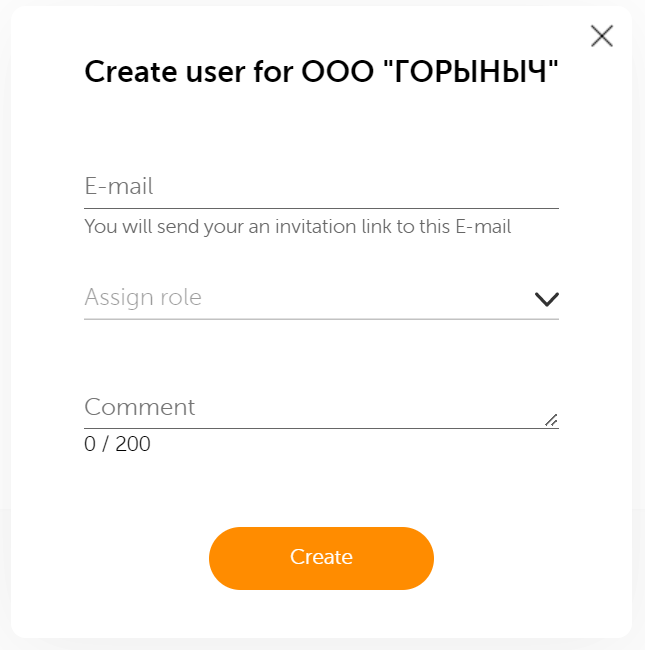
The new user will receive an email with a link to confirm and login to the Account Profile.
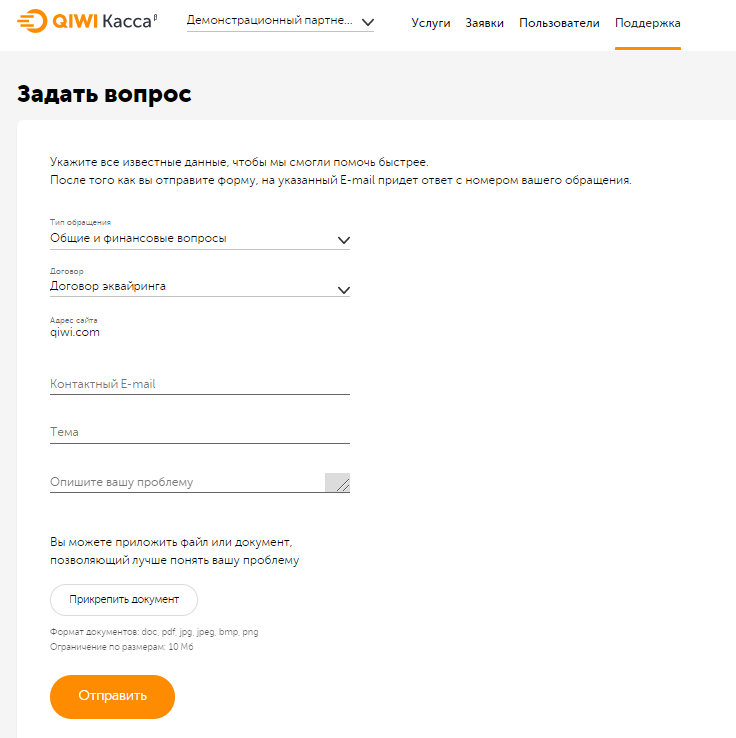
Support
To ask a question to our support team, fill out the form on the tab and click the Submit button.
Account Profile of the Connected Site
The main page of the selected site of your Account Profile has four tabs:
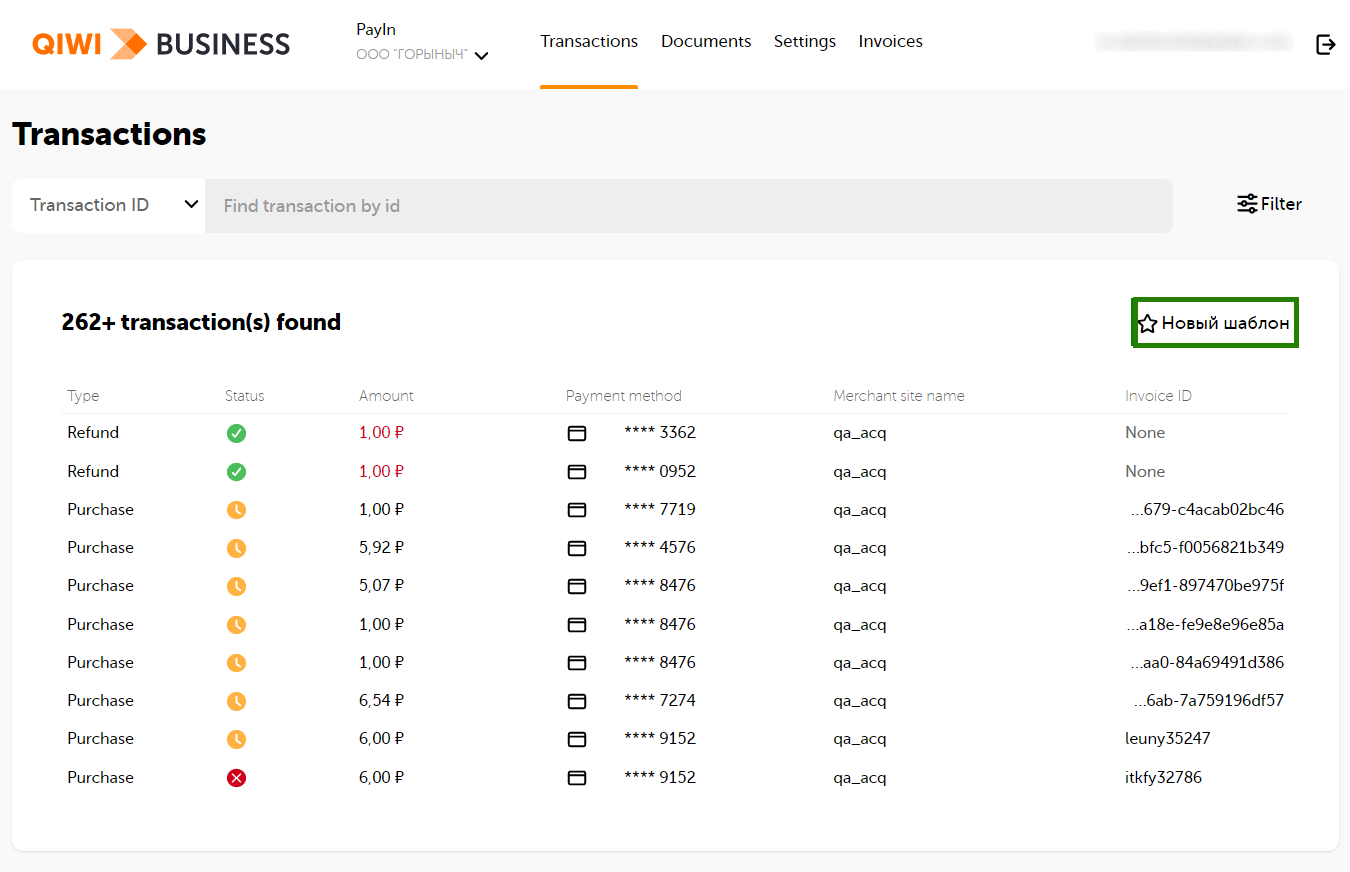
Transactions
The Transactions tab displays a list of transactions for your services.
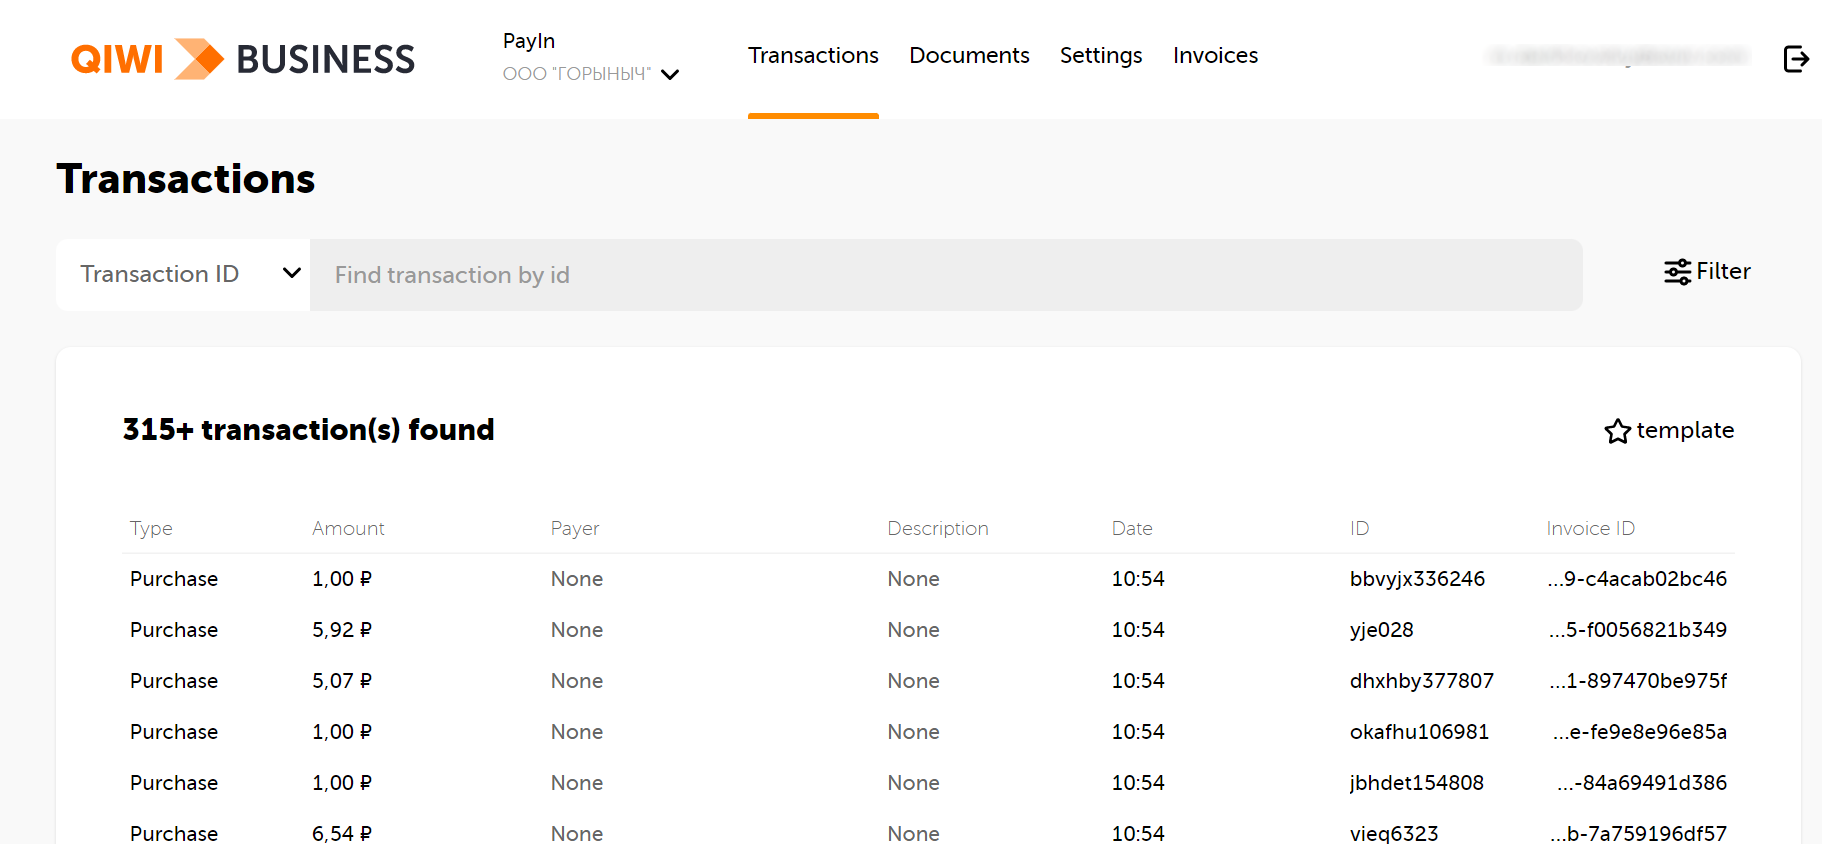
Use the page buttons at the bottom of the list to get access to transactions history.
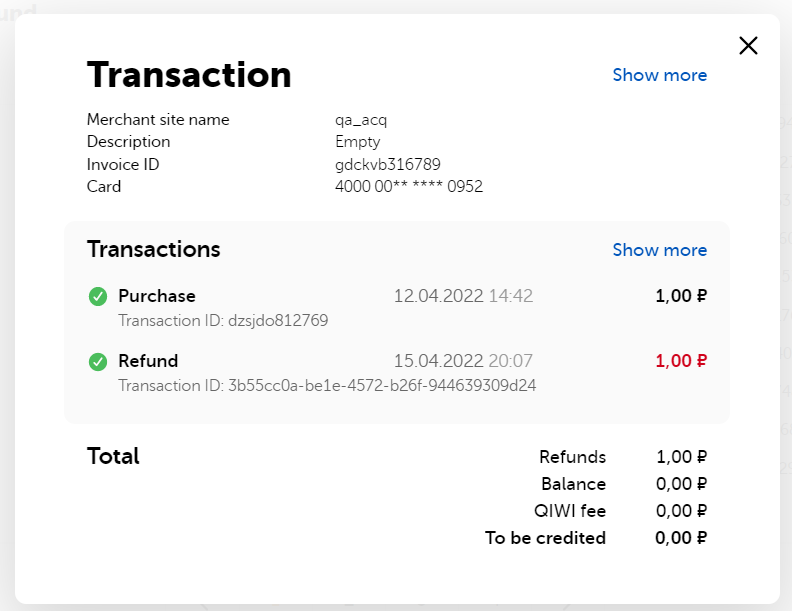
Click on a row in the table to view the details of a particular transaction in a pop-up window.
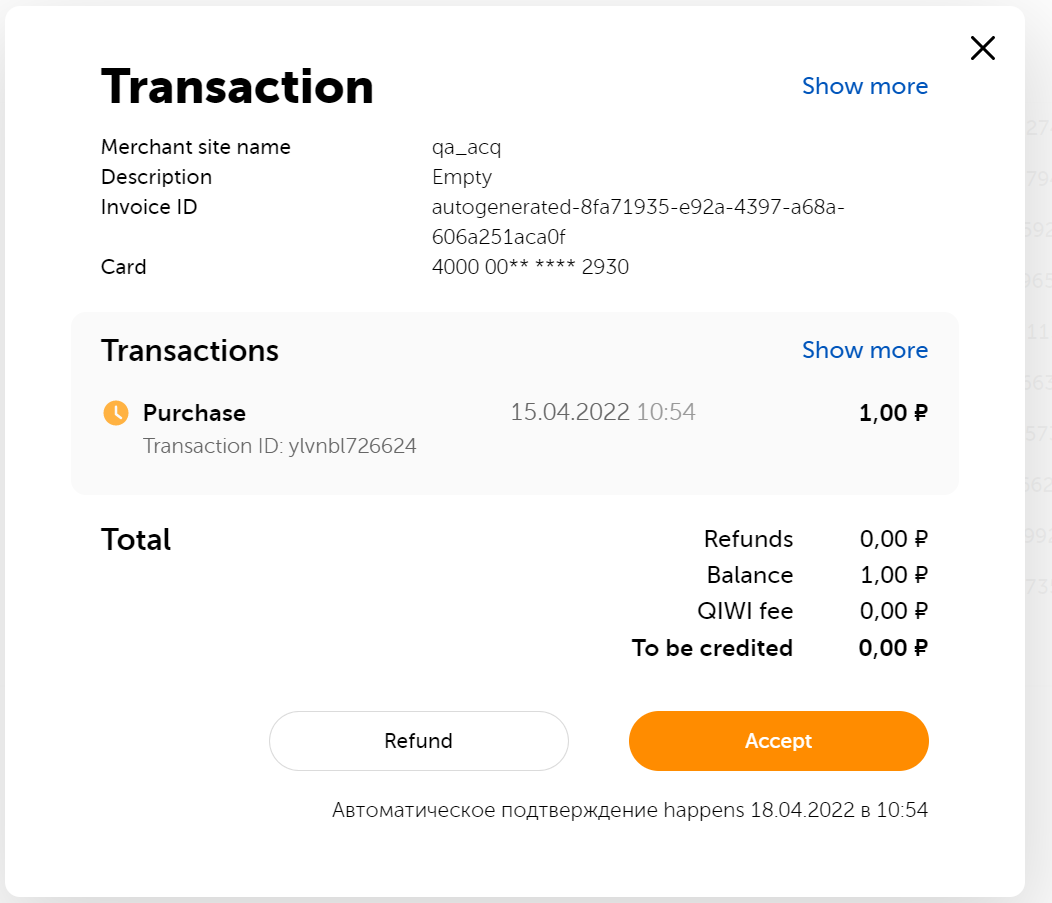
Click Show more to see more information about the transaction (card type, customer data).
You can also:
- Search a transaction.
- Use filter to select transactions.
- Configure columns of transaction list.
- Refund a transaction.
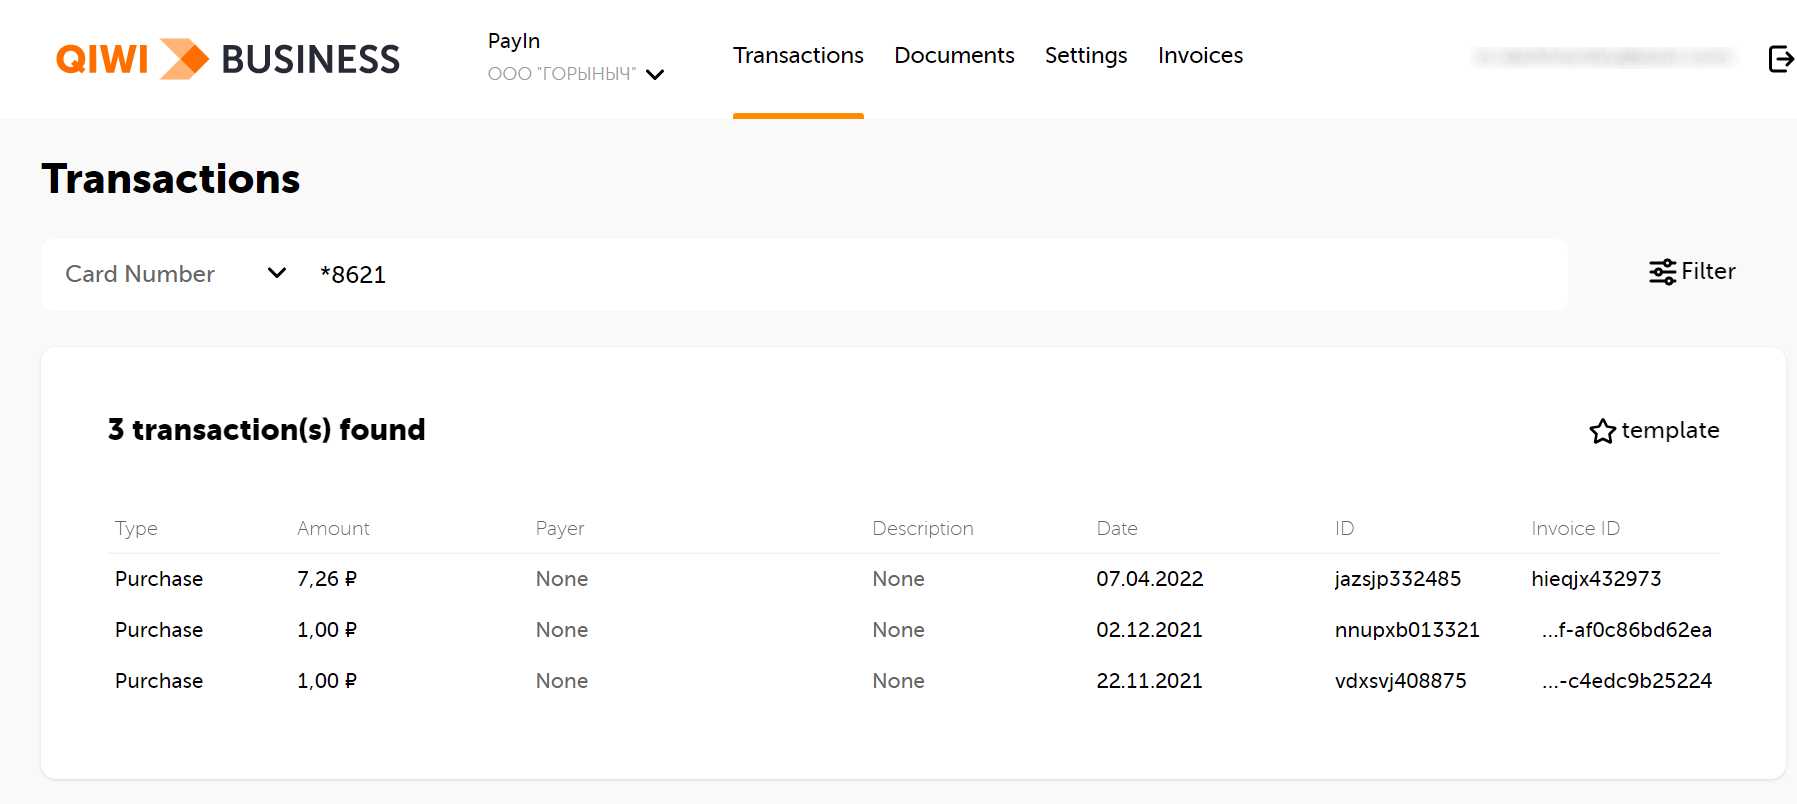
Transaction search
- Select the attribute you want to search for transactions by in the field next to the search string:
- Transaction ID — exact match.
- Invoice ID — exact match.
- Card Number — in a free format, but either the first few digits or the
*character and the last digits are required. For example:411111*1111411111*1111
- Authorization Code — exact match.
- Customer Name — exact match.
- Email — exact match
- Phone — exact match.
- Custom fields — exact match.
- Specify the value of the selected attribute in the search bar and the system will automatically load the list of found transactions.
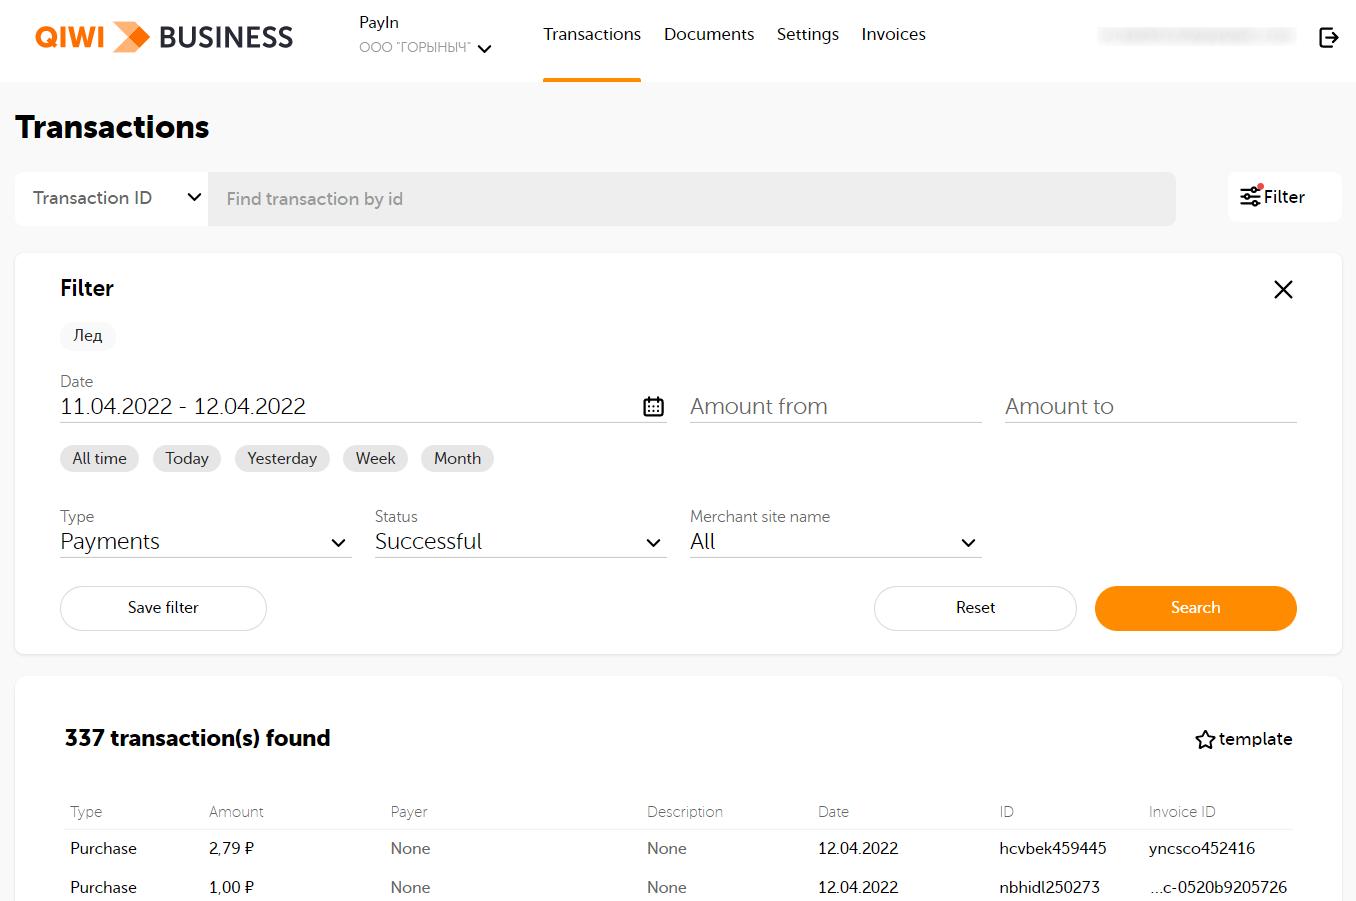
Selecting transactions with filters
You can filter the list of transactions by specified criteria:
- Click the
 Filter icon and select transaction parameters. Specify data or select from the drop-down list. Available filters for selection:
- Date — Transaction period. You can use predefined values: Today, Yesterday, Week, Month.
- Amount from — The minimum transaction amount.
- Amount to — The maximum transaction amount.
- Type — Transaction type (Payments, Refunds).
- Status — Transaction status. Possible transaction statuses:
- Successful — the payment was successful.
- New - transactions for which there was no completed payment attempt (for example, the user did not go to 3-D Secure, or left the 3-D Secure page).
- Declined - payment that was rejected (the reason for the rejection is displayed when viewing the transaction).
- Merchant site name — The service for which the transaction was made.
- Press the Search button. The list will display all transactions matching the selected filters.
Transaction display template
You can create your own transaction list columns template:
- Click
 Template button.
 -
Click Create New button in the popup window.
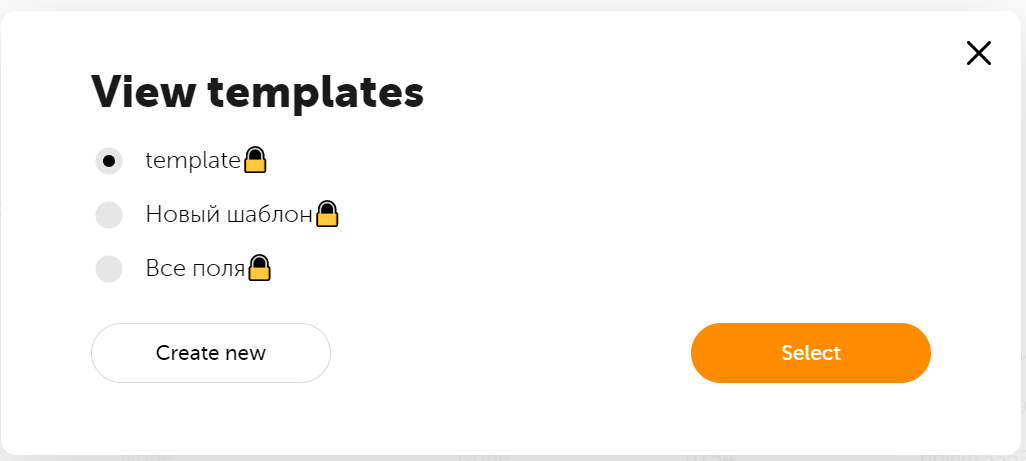
-
Select the fields to display. To adjust the order of the columns in the transaction list, drag the fields.
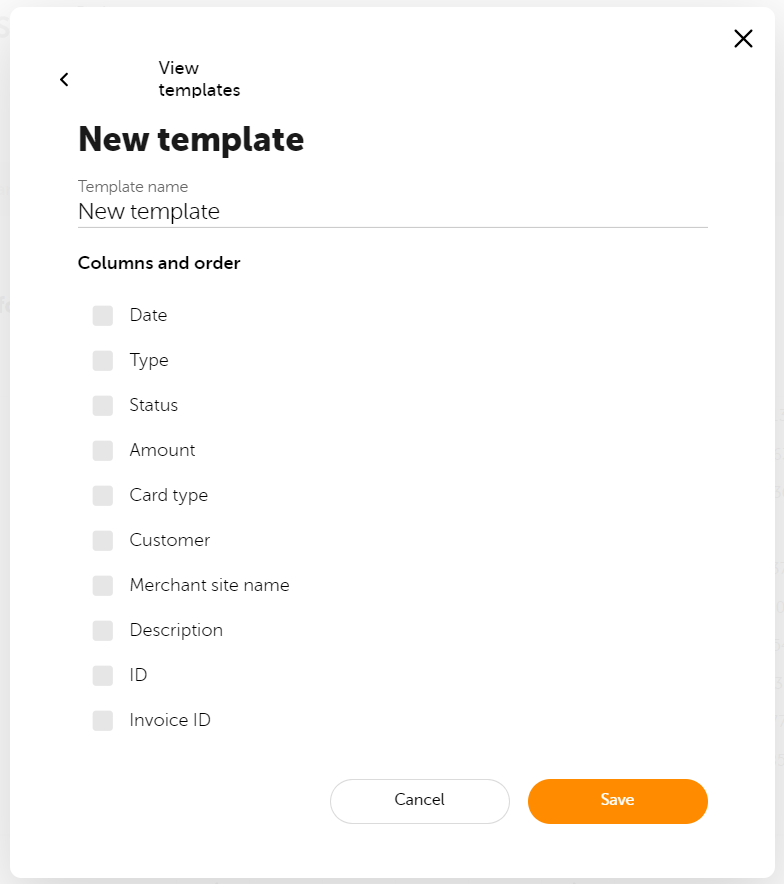
- Click Save button.
To use the created template, click Template button and select a template.
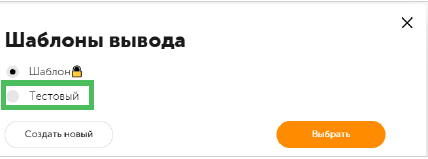
The transaction list view will change according to the template.
Refund transactions
- On Transactions tab click the transaction to be refunded.
-
In the window that opens, click Refund.
-
Fill in the fields Refund reason, Amount.
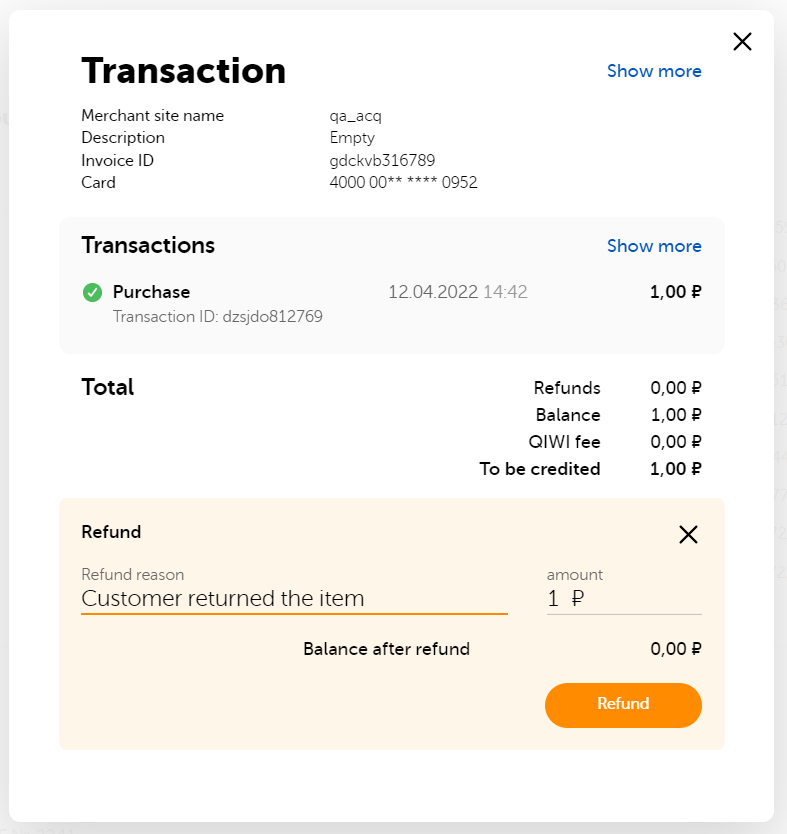
- Click Refund.
-
Check the data and close the window.
Documents
The Documents tab contains two sub-tabs — Registers and Acts. Section Acts is under development.
Registers
The register in the Account Profile contains a list of all transactions, including unsuccessful ones (with a description of the error code) and unconfirmed ones (holding).
On Registries tab, you can set up distribution of registries by e-mail:
- Click New mailing list.
- Specify an e-mail to send registries. You can add multiple addresses.
- Click Save button.
Settings
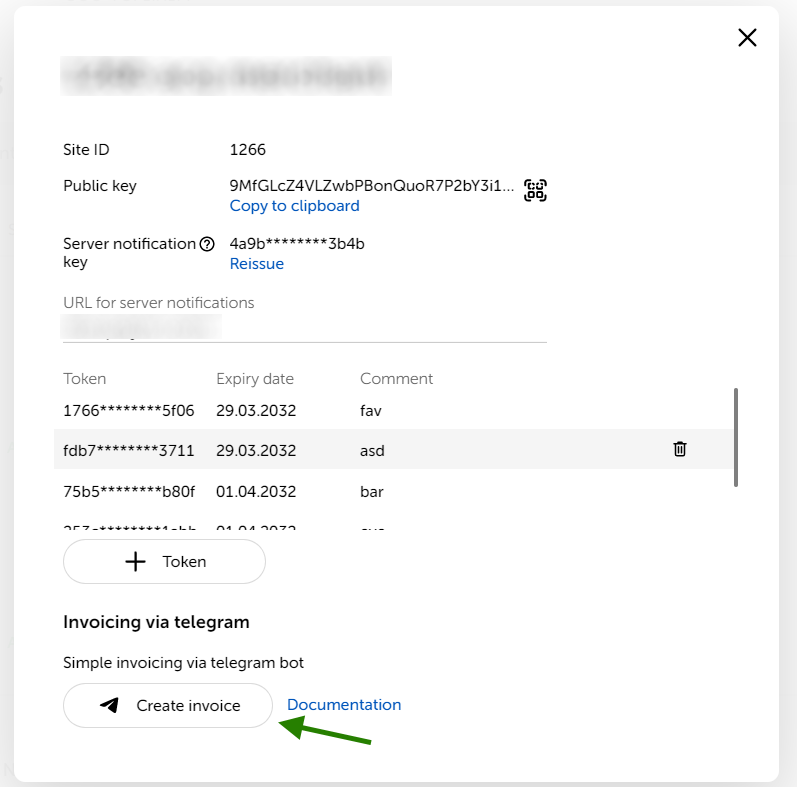
The Settings tab displays a list of sites for the selected service and issued API tokens for each site. On the tab you can:
- create API token;
- get the site identification key (
publicKey) for integration with the QIWI Payment Form without using the API; - get key for server notification authorization;
- create invoice via Telegram bot.
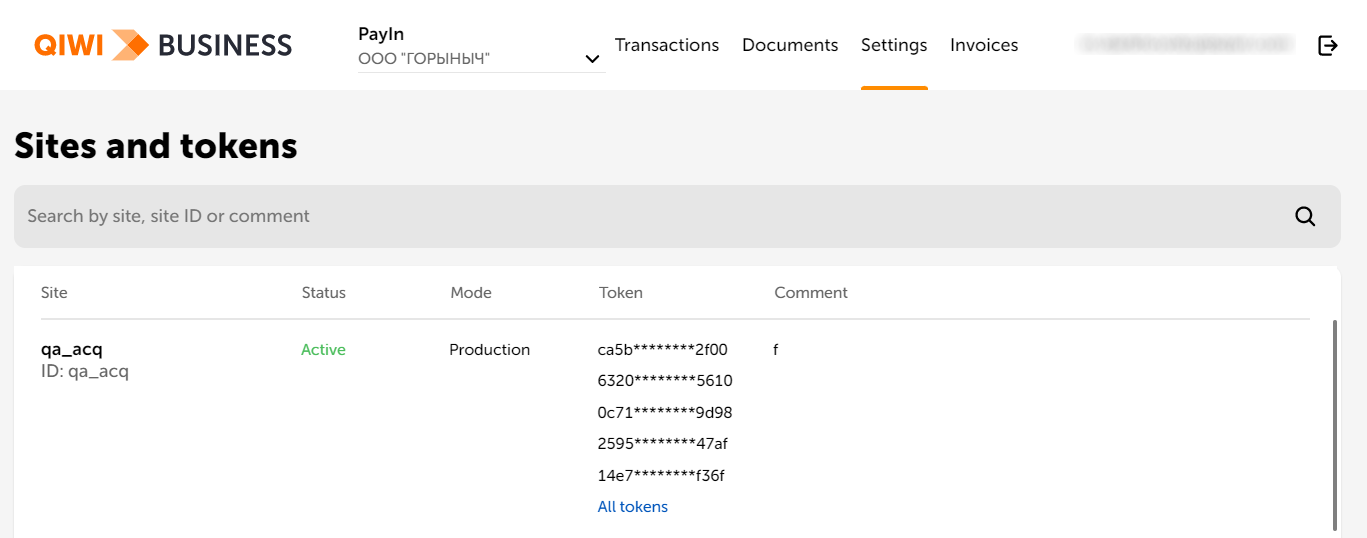
Create token
On Settings tab, you can create tokens required for the protocol integration. Token is a character string that is used:
- for authentication in QIWI;
- for integration and interaction with the QIWI API.
When a token reissue may be needed:
- a new site is added after the token has been issued;
- a new payment method was enabled for the site.
To issue a token:
- Click the required website on the tab.
- Fill in the Comment for the token field in the pop-up window.
-
Click Save button.
-
Click the Copy to clipboard link to copy the token. Keep it out of the reach of third parties.

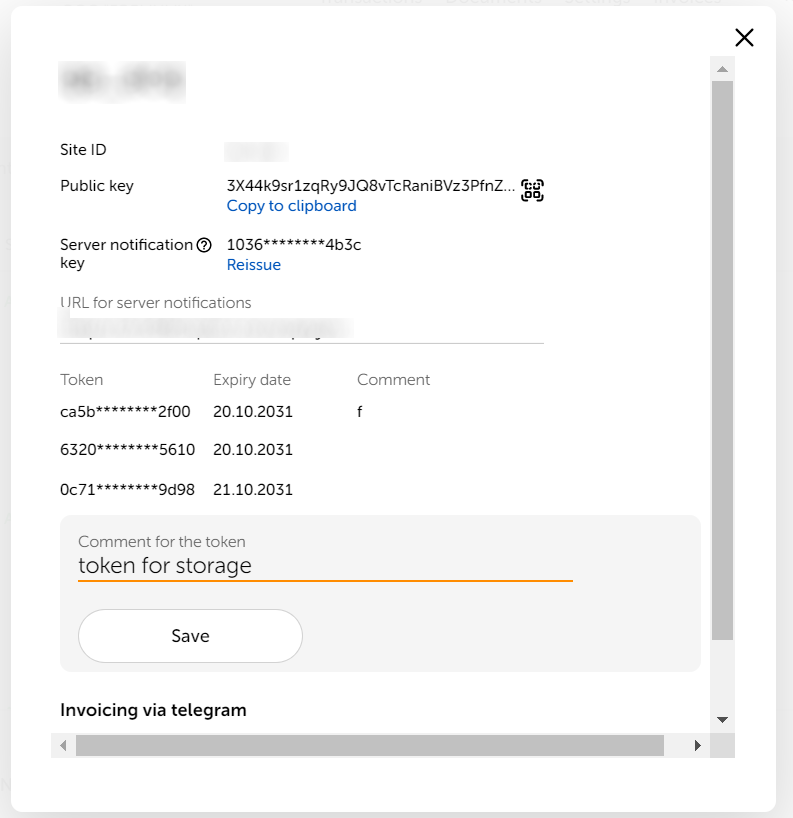
Public Key
To get the public key:
- Click the required website on the tab.
- Find the Public key field in the pop-up window.
- Click Copy to clipboard to copy and save the key.
Notification key
Secret is server notification key. You can set the URL of the server to process notifications or reissue the key.
-
Click the required website on the tab.
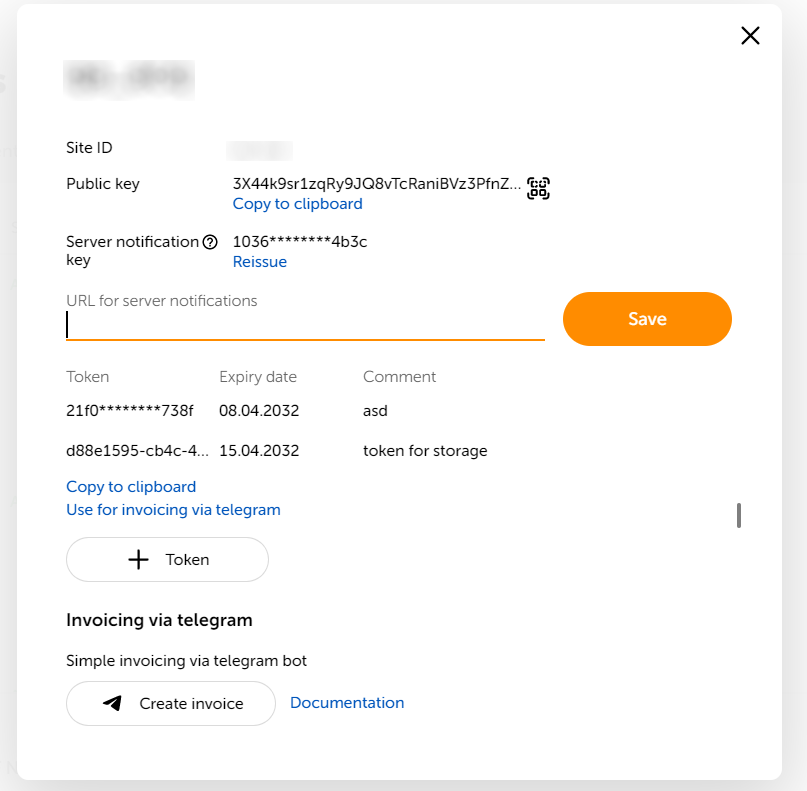
- To reissue a key, click the Reissue link.
- To set the server URL for processing notifications, enter it in the URL for server notifications field and click the Save button.
Invoicing via Telegram
Immediately after creating an API token, the link Use for invoicing via telegram is available in the window with the list of tokens and site keys.
Clicking on the link will open a chat with the payment bot in the Telegram app. Start the dialogue with the /start command:

After that, you can issue invoices to buyers through the Telegram bot.
If you already have tokens and you do not want to issue a new one, then click the Create invoice button in the window with the list of tokens.
A chat with the payment bot in the Telegram app will open. Start the conversation with /start and copy any previously saved and valid token to the chat:
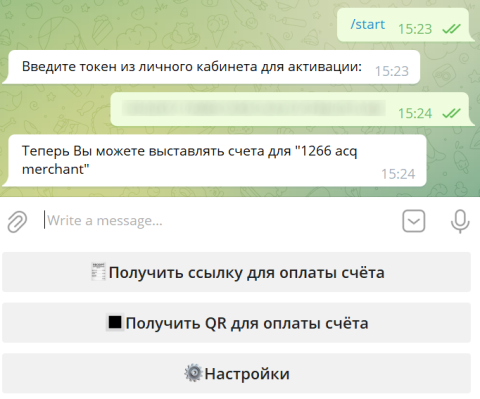
After confirmation, you can issue invoices to buyers through this Telegram bot.
QR codes for payment
To get paid by your customers both online and offline, you can generate a QR Code for the site's Payment form. Click the  icon near Public key line in the pop-up window with the settings for your site.
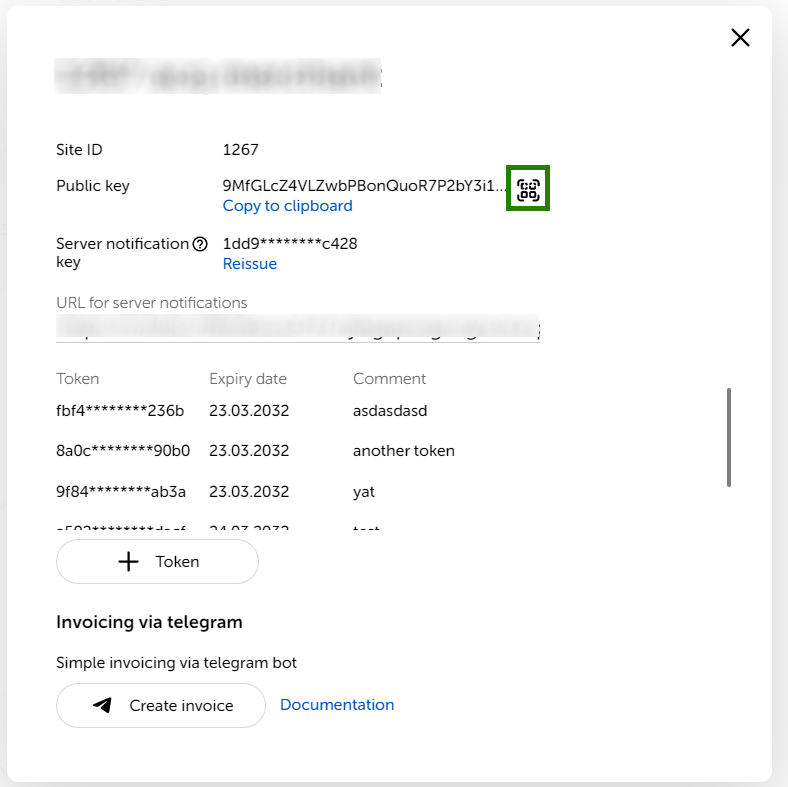
Print or download the generated code for providing your customers.
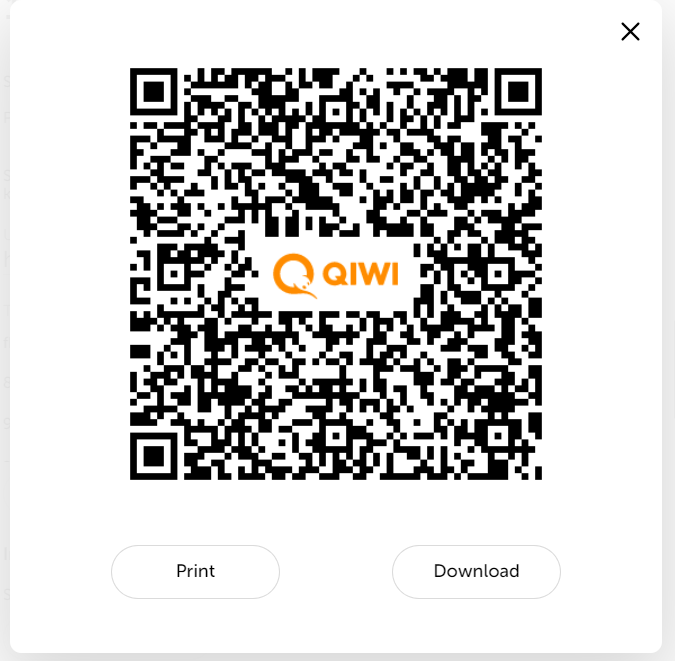
When scanning the QR Code, your customer will follow the link to the Payment form of the site. The customer indicates the purchase amount on the page.
Invoices
In the Invoices tab, manual invoicing of customers (without integration) and viewing of invoices previously issued in this section are available.
Invoice
- Click the New invoice button.
-
Select the site and fill in the required fields.
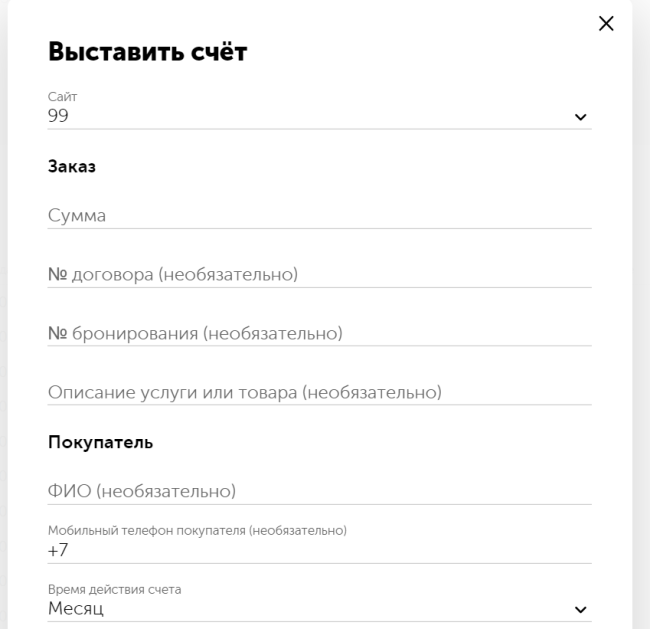
- Click the Create button.
-
The information about new invoice will be displayed.
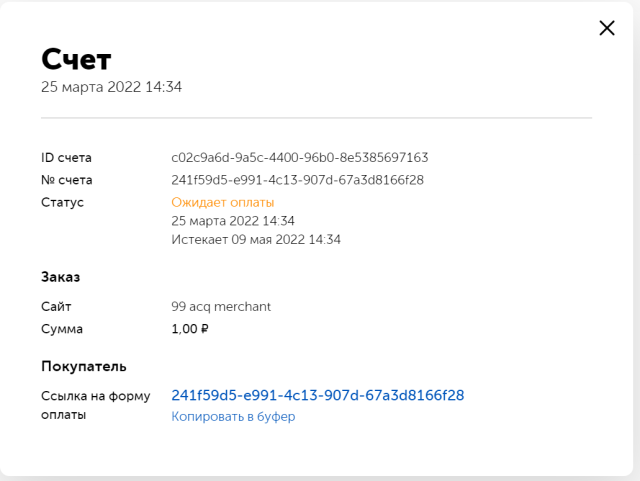
The Payment form URL field displays a link to pay the invoice. Copy it and give it to the customer. Using this link, the customer will open a payment form where they can pay for the purchase.
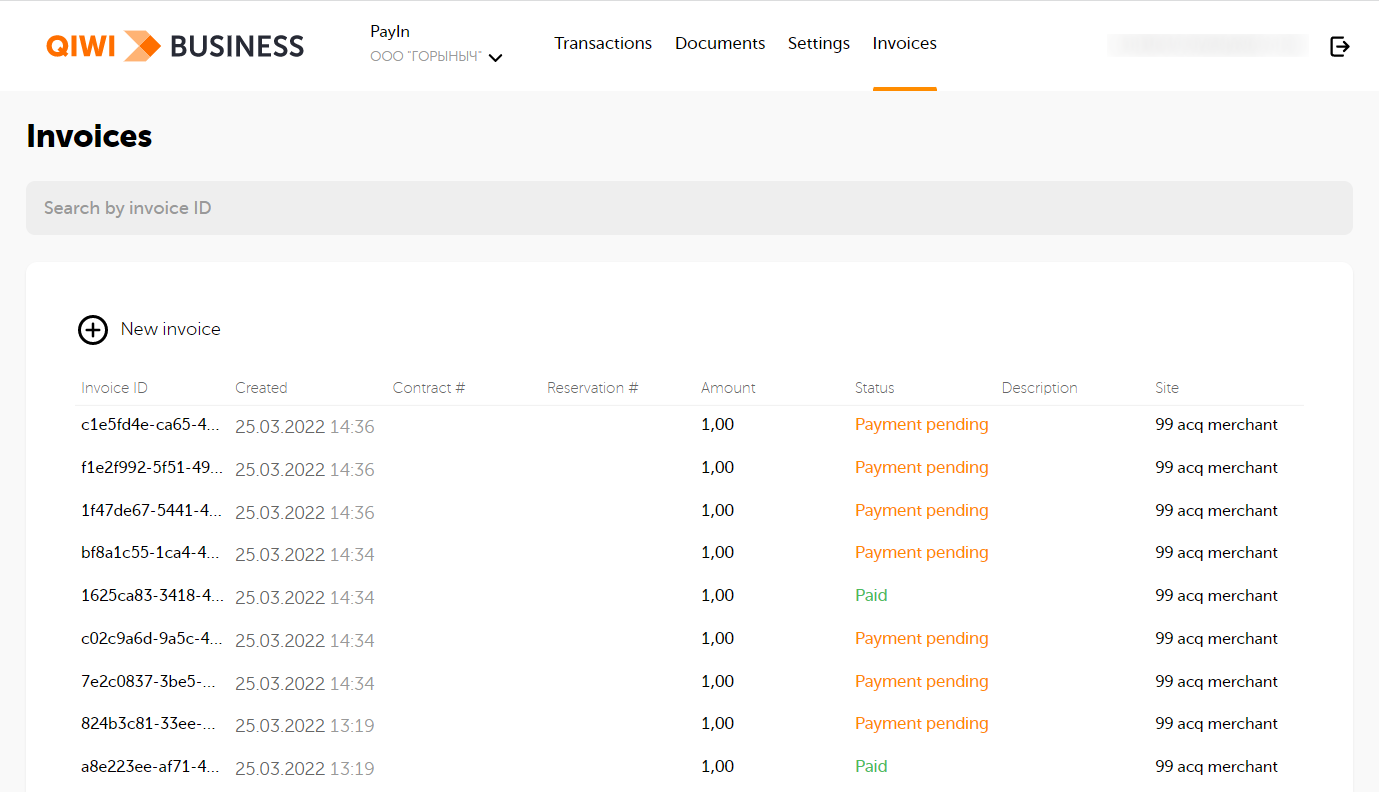
Invoice list
The Invoices tab contains all invoices issued through the site.
To view an invoice, click on the corresponding item in the list. The pop-up window displays account information:
- Account ID.
- Current invoice status.
- Website and invoice amount.
- Link to payment form.
Invoice statuses
An invoice can have one of four statuses:
- Paid — the invoice has been paid by the customer.
- Awaiting payment - the invoice has not been paid.
- In the process of payment - there were several unsuccessful attempts to pay.
- Error — an error occurred while creating the invoice. Try to re-create the account.
Roles in the Account Profile
Roles in the Account Profile differ:
- Accessible sections on the start page.
- Available actions in the Services section.
Administrator
| Type of access | List of available objects / actions |
|---|---|
| Sections on the start page | Services, Applications, Users, Support |
| Home Page Actions | View connected services View abandoned requests Add new users Ask questions |
| Actions on the Services tab | View transactions Make a refund Issue an invoice View the list of invoices Configure the distribution of Registries Create a token |
Manager
| Type of access | List of available objects / actions |
|---|---|
| Sections on the start page | Services, Applications, Support |
| Home Page Actions | View connected services View abandoned requests Ask questions |
| Actions on the tab Services | View Transactions Make a Refund Invoice View the list of invoices Configure Registry Distribution Create a token |
Technician
| Type of access | List of available objects / actions |
|---|---|
| Sections on the start page | Services, Support |
| Home Page Actions | View connected services Ask questions |
| Actions on the Services tab | Viewing transactions Making a refund Invoicing Viewing the list of invoices Setting up the mailing of Registries Creating a token |
Recovering the password from the Account Profile
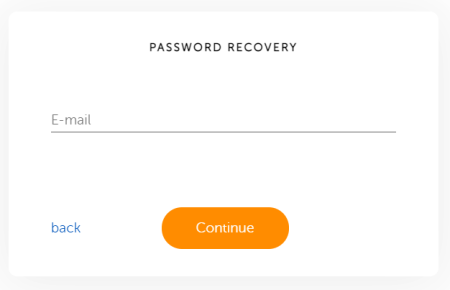
-
Open the link and click Remind me.
-
Enter your e-mail and click Continue.
-
Check your email. You will receive a message with a link to change your password.